
Module 6 · Editing Without an Editor
The five fixes you'll actually need
Reading about editing is one thing; doing it makes it stick. In this lesson you’ll run all five recipes once — click by click, no editor to learn. By the end you’ll have muscle memory for every image job a small business actually needs.
Do these in order on a real image if you have one (a product photo, a headshot, a snap of your storefront). If you don’t, grab any photo — the point is to feel how fast each one is. First, the one-time setup so Canva is ready.
One-time setup (60 seconds)
- Go to
canva.comand click Sign up — “Continue with Google” is fastest. The free account is all you need. - Whenever you need an exact size later, you’ll use Create a design → Custom size. That’s the whole trick to hitting precise dimensions for free.
Recipe A — Remove a background
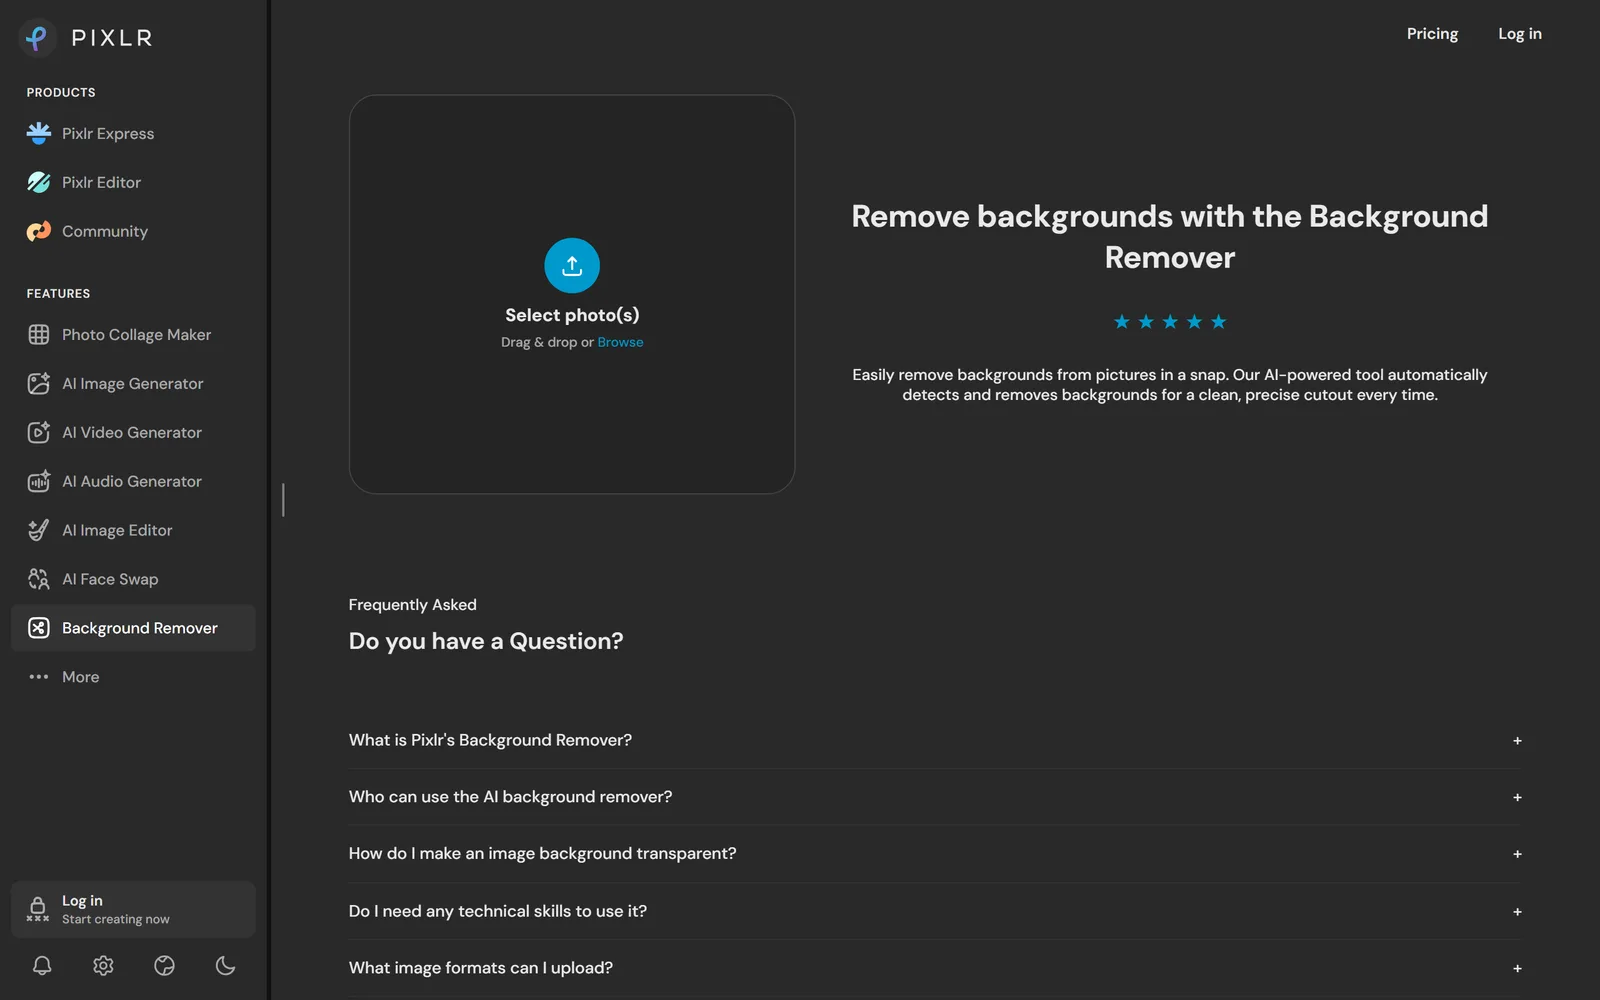
- Open
remove.bg, click Upload Image, and choose your photo. The cut-out appears in about five seconds. Click Download — the free PNG is small (around 0.25 megapixels), which is fine for web thumbnails and avatars. - Need it full resolution? Use
pixlr.com/remove-backgroundinstead — same idea, no watermark, and it gives you the full-size transparent PNG. - If you’re going to keep working on it in Canva, go to Uploads → Upload files and add the transparent PNG.
Why this beats learning an editor: cutting a subject out cleanly used to be a select-and-mask chore. Now it’s one upload and a download.
Recipe B — Crop or resize for a platform
- In Canva, click Create a design → Custom size, type the target (for example
1080 × 1080for a square social post), and click Create new design. - Uploads → Upload files → your image, then drag it onto the canvas.
- Drag the corner handles to fill the frame. Double-click the image to crop — reposition it, then click Done.
- Share → Download → PNG (or JPG) → Download.
Canva’s one-click “Resize” is a Pro feature. On the free plan, just create each size as its own new custom design — it takes an extra minute, and it costs nothing.
Why this beats learning an editor: exact dimensions are the one thing AI can’t hit. A custom-size canvas gets you a pixel-perfect export every time.
Recipe C — Brighten or clean up a photo
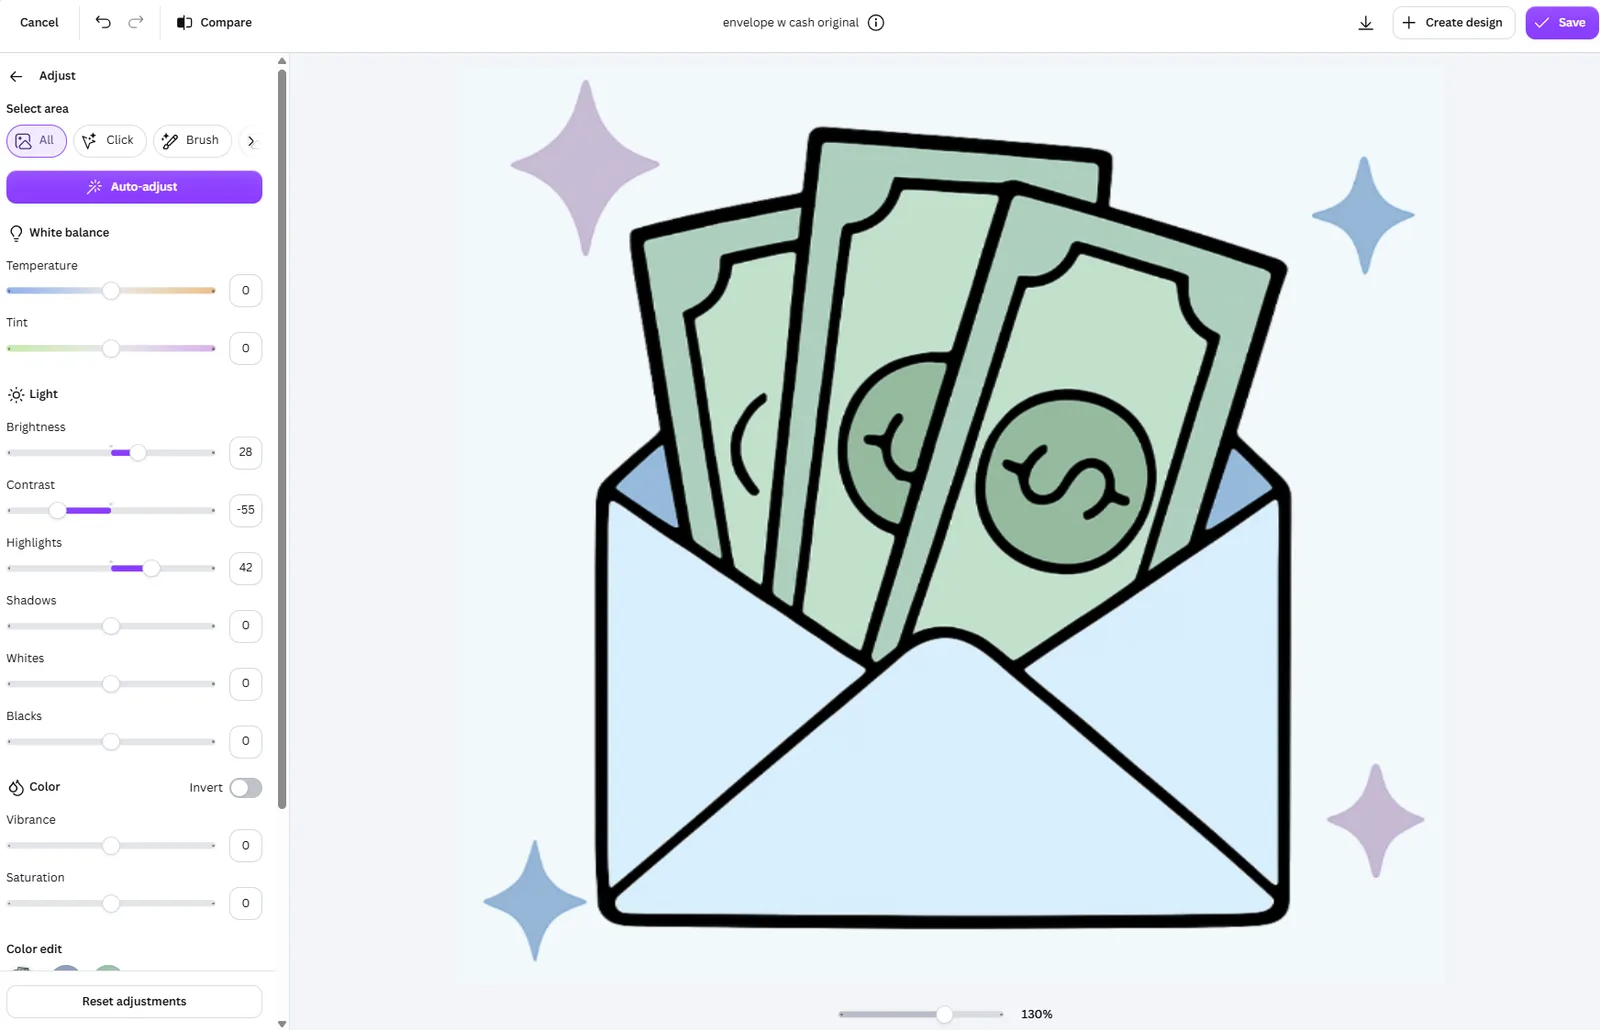
- Click your photo on the canvas, then Edit photo in the top toolbar.
- Open the Adjust panel and drag Brightness, Contrast, and Vibrance until it looks right. All three sliders are free.
- Want to remove a stray object (a bin, a passer-by)? Canva’s Magic Eraser is Pro — on the free plan, just describe the removal to Gemini or ChatGPT instead: “remove the trash can on the left.”
- Share → Download.
Why this beats learning an editor: three sliders do what “levels and curves” used to take a tutorial to explain — and for the messy stuff, you just say what you want gone.
Recipe D — Put your logo on a thing
- Uploads → Upload files → your transparent-PNG logo.
- Drag it onto the background image — the mug, the sign, the storefront.
- Drag the corner handles to size it, move it into place, and use the Transparency and rotate controls in the top bar to blend it in.
- Share → Download.
Canva gives you an exact, faithful logo placement. For a photorealistic look — the logo curving around a coffee cup, printed on a real shirt — use the AI route in the next lesson (“place this logo on the coffee cup”). Just check the AI didn’t warp the mark.
Why this beats learning an editor: dragging a transparent PNG onto a photo is something you already know how to do — it’s the same motion as moving a sticker.
Recipe E — Simple text on an image
- In the left panel, click Text → Add a text box.
- Type your words, then set the font, size, and color in the top toolbar — use your brand’s Google Font and the exact hex from your brand book.
- Drag it into position, then Share → Download.
AI image editors misspell and can’t match your font. Adding text in Canva with your real brand font and hex is what keeps a promo graphic looking like you made it, on purpose.
Why this beats learning an editor: real, editable text in your real font — not baked-in, not misspelled, always on-brand.
You ran all five recipes once: removed a background, resized to an exact size, brightened a photo, placed your logo, and set on-brand text. That’s the entire practical editing skill set for a small business — and you did it without opening a real editor. Next lesson: the shortcut for everything else, where you just describe the edit.
If a tool ever feels fiddly, that’s usually a sign you’re in the wrong one for the job. Check the matrix on your cheat sheet — the right tool makes these feel easy, because they are.
Watch this step
Two clips for the five recipes: the first runs the Canva jobs end to end (crop, adjust, text, logo), and the second shows the free full-res background removal in Pixlr — recipe A on screen. It’s from an independent creator — credited below, so go give them a follow.
Canva Tutorial for Beginners (How to use Canva step by step)
How To Remove Background In Photopea - Full Guide
More learning resources
Still want another angle? These are hand-picked and vetted to line up with this lesson — from creators and sites worth your time.